

Dieser Leitfaden richtet sich an Spieler der Lyra-Harfe, die lernen möchten, wie man geeignete Saiten auswählt, sie sicher wechselt und das Instrument effektiv stimmt. Er behandelt materielle Unterschiede, Spannungsüberlegungen, Installationsschritte und Best Practices beim Stimmen.
1. Verständnis der Saitenmaterialien & deren Einfluss
Die Wahl des Saitenmaterials hat einen tiefgreifenden Einfluss auf Klang und strukturelle Belastung der Lyra-Harfe. Gängige Materialien sind Stahlsaiten (oder einfache Metallseile)grau Nylonsaiten (oder Fluorkohlenstoffsaiten), mit gelegentlichen historischen Optionen wie Darm oder Seide bei maßgeschneiderten Instrumenten.
Zum Beispiel bemerkte ein Nutzer, dass der Wechsel von Stahl auf Nylon die Saitenspannung auf seiner Lyra deutlich reduzierte: „Die tiefste Saite … benötigt etwa 16 kg Spannung, um den Ton zu erreichen“, wenn Stahl verwendet wurde. Nylonsaiten oder Fluorkohlenstoffsaiten verlangen in der Regel geringere Spannung, was die Belastung der Verbindungen und des Gehäuses des Instruments verringern kann.
Hier ist ein Vergleich:
- Stahlsaiten: Heller, projizierender Klang, höhere Spannung → möglicherweise größere Belastung für Rahmen und Stimmmechanik.
- Nylon-/Fluorkohlenstoffsaiten: Weicherer Klang, nachsichtiger bei Spannungsschwankungen, stabil bei Feuchtigkeitsänderungen — aber möglicherweise leiser oder weniger sustain in sehr resonanten Räumen.
Welche sollten Sie wählen? Wenn Ihre Harfe klein ist oder Sie leise/innen spielen, ist Nylon eine schonendere Wahl. Wenn Sie mehr Projektion benötigen oder in größeren Räumen auftreten, könnte Stahl besser geeignet sein.
2. Saitendicke, Spannung & Instrumentendesign
Ein entscheidender Faktor bei der Saitenauswahl ist die Dicke (Gauge) und wie diese bei einer bestimmten Tonhöhe in Spannung umgerechnet wird. Bei Lyren berichtete ein Spieler: „Ich bin gerade dabei, meine [Alt]-Lyra zu restaurieren … die tiefste Saite (0,064 Zoll Gauge Stahl) benötigt etwa 16 kg Spannung … und die höchste Saite (0,009 Zoll) etwa 11 kg.“
Das zeigt uns zwei Dinge: (a) dickere/schwerere Saiten erhöhen die Spannung; (b) das Instrument muss so gebaut sein, dass es dieser Spannung standhält. Beim Saitenwechsel sollten Sie sicherstellen, dass die neue Saitenstärke für die Skala, die Saitenlänge und die Gehäusefestigkeit Ihrer Harfe geeignet ist.
Weitere praktische Hinweise:
- Prüfen Sie das Original-Saiten-Set Ihrer Harfe oder die Empfehlung des Herstellers, bevor Sie Ersatz kaufen.
- Wenn Sie von Stahl auf Nylon wechseln, können Sie die Durchmesserstärke (wie im Referenzleitfaden vorgeschlagen) verdoppeln, um bei niedrigerer Spannung einen ähnlichen Ton zu erzielen.
- Wenn Ihre Lyra viele Saiten hat (16, 19, 24 usw.), stellen Sie sicher, dass die Spannung gleichmäßig über das Gehäuse verteilt ist — ungleichmäßige Spannung kann zu Verformungen oder Rissbildung führen.
3. Wie man Saiten sicher entfernt & wechselt
Saitenwechsel klingt einfach, aber eine schlechte Durchführung kann Ihr Instrument beschädigen. Beginnen Sie damit, die alten Saiten schrittweise zu lockern — reißen Sie sie niemals ab. Ein Forenbenutzer rät: „Das eigentliche Tutorial beginnt bei 1:10 …“ für eine Schritt-für-Schritt-Anleitung zum Austausch.
Hier ist ein sicherer Ablauf:
- Lockern Sie die alte Saite, bis sie schlaff ist, dann wickeln Sie sie vom Stimmmechanismus ab und entfernen Sie sie vom Steg oder der Endanschlag.
- Reinigen Sie den Brückensattel, den Bereich des Stimmstifts und prüfen Sie auf Abnutzung oder Beschädigung.
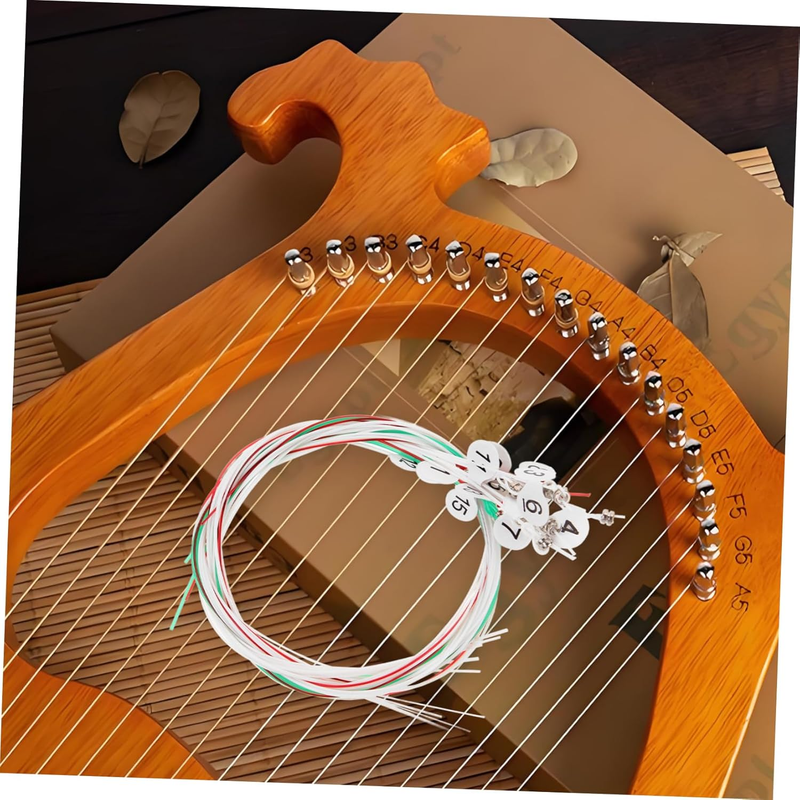
- Wählen Sie die Ersatzsaite aus; stellen Sie sicher, dass Sie den richtigen Durchmesser und das Material verwenden.
- Saiteninstallation: Befestigen Sie sie sicher (z. B. Ball-End, Knoten oder Schlaufe, je nach Harfe) am Schwanzende, dann wickeln Sie sie um den Stimmstift. Lassen Sie etwa 2-3 Windungen, klemmen Sie das Schwanzende ein oder machen Sie einen kleinen Knoten.
- Langsam bis zur gewünschten Tonhöhe stimmen; neue Saiten dehnen sich mehr – auf Tonabfall hören und nach 24 Stunden nachstimmen. Forum-Tipp: „Lassen Sie die Saite… dehnen und dann erneut stimmen.“
Wichtige Sicherheitshinweise:
- Vermeiden Sie es, neue Saiten zu stark zu spannen: zu hohe Spannung kann Bruch oder Rahmenbeschädigung verursachen.
- Wenn möglich, eine Saite nach der anderen wechseln, um die Gesamtspannung stabiler zu halten.
- Wenn Sie das Material wechseln (Stahl → Nylon), erwarten Sie ein anderes Spielgefühl und Stimmverhalten – „die Ergebnisse variieren je nach Lyra und Saiten.“
4. Stimmen Ihrer Lyra-Harfe – Schritt für Schritt
Stimmen ist essenziell für einen guten Klang und angenehmes Spielen. Laut einem Stimmführer verbessert die richtige Stimmung die Resonanz und verhindert Instrumentenstress.
Viele Anfänger haben Schwierigkeiten zu wissen, wo sie anfangen sollen, wie viel sie einstellen müssen und wie sie die Stimmung halten.
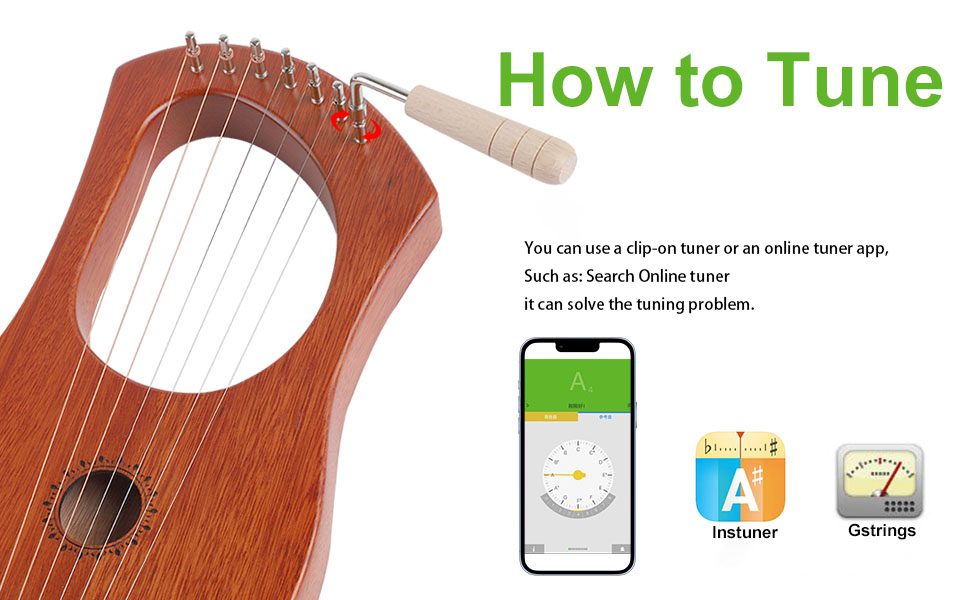
Empfohlenes Werkzeug:
- Chromatischer Tuner (oder Stimm-App/Online-Tuner) auf „Konzert A = 440 Hz“ eingestellt.
- Stimmwinde oder -schlüssel passend zu Ihren Stimmstiften.
- Leise Umgebung und stabiles Instrumentenposition.
Stimmprozess:
- Lyra in Spielposition sichern, die tiefste Saite (oder zentrale Referenz) zupfen und den Ton prüfen.
- Wenn der Ton zu tief ist, den Stimmstift im Uhrzeigersinn drehen (Ton erhöhen); wenn zu hoch, gegen den Uhrzeigersinn drehen. Kleine Anpassungen vornehmen.
- Die nächste Saite in der Sequenz stimmen, bis alle gestimmt sind (für diatonische C-D-E-F-G-A-B-Skala, die oft bei Anfängerylen verwendet wird).
- Nach einem Durchgang frühere Saiten erneut überprüfen – sie könnten sich durch Spannungsänderungen verschoben haben. Wiederholen Sie den Vorgang, bis die Stimmung stabil ist.
- Bei neuen Saiten ist mit „Settle“-Effekt zu rechnen: Nach der ersten Stimmung 24-48 Stunden warten und erneut prüfen.
5. Häufige Probleme & Fehlerbehebung
Auch bei sorgfältiger Arbeit können Lyra-Harfenbesitzer auf Probleme stoßen:
- Saiten rutschen aus der Stimmung: Häufig durch unzureichende Wicklungen am Stimmstift oder lockeren Stift. Lösung: Wicklungen erhöhen, kleinen Knoten hinzufügen, Stiftfestigkeit prüfen.
- Spannungsbedingte Belastung des Gehäuses: Ungleichmäßige Spannung oder zu dicke Saiten können das Instrument verziehen. Forum-Nutzer berichten, dass dies bei Saitensätzen mit niedrigem Durchmesser bei Stahl vorkommt.
- Saiten reißen wiederholt: Mögliche Ursachen: zu hoher Ton, schlechte Saitenqualität, falscher Durchmesser. Ein Nutzer fand, dass der Austausch gegen eine Gitarrensaite mit kleinerem Durchmesser das Problem löste.
- Neue Saiten setzen sich nie vollständig: Dies kann auf Materialwechsel (Stahl → Nylon) zurückzuführen sein, der häufigeres Nachstimmen erfordert, bis sich die Spannung stabilisiert.
6. Zusammenfassung & Abschließende Tipps
Die Wahl der richtigen Saiten, sorgfältiges Aufziehen und präzises Stimmen sind grundlegende Schritte für jeden Lyra-Harp-Spieler. Das Material, die Stärke und die Spannung, die du auswählst, beeinflussen Klang, Haltbarkeit und die Gesundheit deines Instruments.
Nimm dir bei jedem Schritt Zeit: Überprüfe und reinige die Saiten beim Neueindecken, stimme langsam und überprüfe die Stimmung nach dem Einspielen der Saiten. Mit konsequenter Pflege klingt deine Lyra-Harp schön und bleibt über Jahre zuverlässig.
Viel Spaß beim Spielen — möge deine Saiten stets klar erklingen!